![[Image of the remaining part connected
by a few wires]](loose-parts.jpg)
Now the remaining parts are held together by tree pairs of cables: the thick red and black ones from the battery compartment to the main board, the thin red and black ones from the buffer battery to the main board, and the yellow ones from the main board to the lens/sensor unit. To remove this unit, you have to unsolder the yellow cables, most easily on the left end. The oher two pairs can stay connected (but I managed to tear off one of the thin wires and although I soldered it back on, there is still something wrong and now the camera forgets the date and time whenever I switch it off).
![[Image of the lens block with and without
sensor flipped up]](sensor.jpg)
Now you can remove the lens/sensor unit. If you want, you can remove and clean the mechanical parts from the front side of the lens, as I have done in the pictures, but if all you want to do is remove the filter, you are only three screws from the finish line. If you remove them, you can flip the sensor up and see the filter, the tiny green or pink (depending on how you look at it) piece of glass. Scratch off the glue that holds it along the sides and lift it off with a small screwdriver.
![[Image of the removed filter and the DIY-replacement]](filter.jpg)
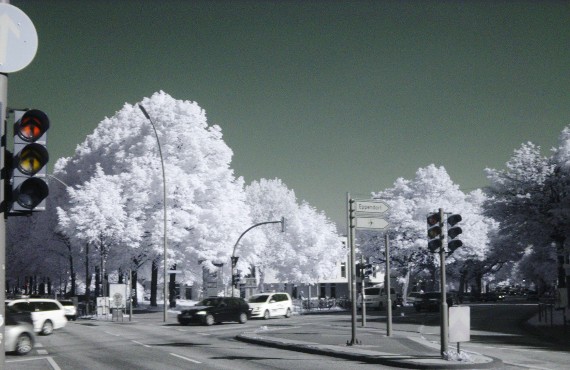
Some people have reported autofocus problems after removing an IR filter because the missing glass changes the optical properties of the whole assembly. This is especially problematic if the filter is a coating on a 2mm piece of glass, but I didn't want to take the chance and fashioned a replacement filter from a piece of overexposed developed negative film. This is almost opaque in the visible, but leaves IR through, and I have acceptable autofocus behaviour (apart from the usual problem that the AF decides to focus on something other than what I want it to). The main problem is that developed film is not a very good IR pass filter, even in bright sunlight the camera has to use long exposures, large apertures and high ISO values (CHDK'S auto-ISO comes in handy here), so the images come out grainy and with motion blur.